How To Use Lead Tags

Written by Jenna Tighe
Updated at July 17th, 2023
- Agent Elite University
- My Account
- Design Studio
- Local Presence
-
Website
CRM - Real Estate Real Estate Specific (Click here for a full list of articles) Email Marketing Automation and Integration (Click here for a full list of articles) Integrations Landing Pages Single Property Websites & Flyers Blogs Mortgage Specific (Click here for a full list of articles) Analytics IDX Search Engine Optimization (SEO) Team Marketing Automation
- Facebook Ads
- Agent Elite Max
Table of Contents
In the Agent CRM, you can create and apply tags to your leads to track, filter, and categorize more efficiently.
Applying Tags to a Lead
- Navigate to a specific Lead's record page.
- In the Contact box, locate the TAGS field.
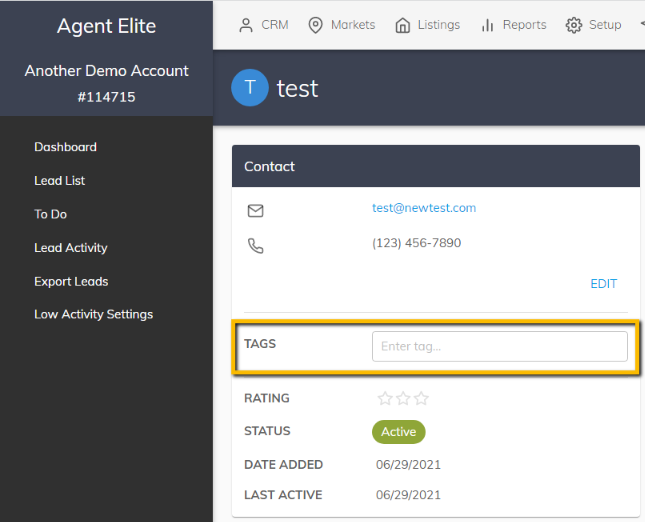
- Click in the Enter Tag field and begin typing in the tag you want to apply to the lead.
- Select a pre-existing tag from the dropdown or create a new one by typing in the desired Tag name and selecting the Create option.

- Once you apply a tag, a grey chip with that tag name appears under the TAGS field.

- You can remove a tag from a lead by clicking the "x" button next to the tag name.
Filtering/Searching Leads by Tag
You can go to the Lead List page and filter your leads based on tags.
- Navigate to the Leads List by clicking on CRM at the top of the page and selecting Lead List on the left panel.

- Click the FILTERS button in the upper right to open the Filter options.
- Select one or more tags by checking the tag checkbox on the right side of the Filter options screen. Only tags applied to 1 or more leads will appear on the Filter options screen.

- Click VIEW LEADS to see all the leads matching the selected tags.