How To Update Your Email Address

Written by Jenna Tighe
Updated at September 6th, 2023
- Agent Elite University
- My Account
- Agent Elite Max (CRM)
- Design Studio
- Local Presence
-
Website
Real Estate Specific (Click here for a full list of articles) Email Marketing Automation and Integration (Click here for a full list of articles) Integrations Landing Pages Single Property Websites & Flyers Blogs Mortgage Specific (Click here for a full list of articles) Analytics IDX Search Engine Optimization (SEO) Team Marketing Automation
- Facebook Ads
If you need to change your email address across the board, here are the places you must go to update it.
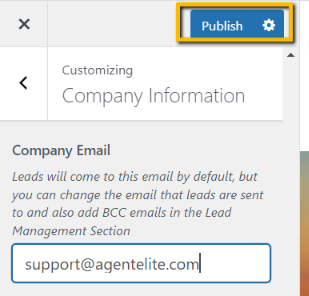
Customizer → Company Info
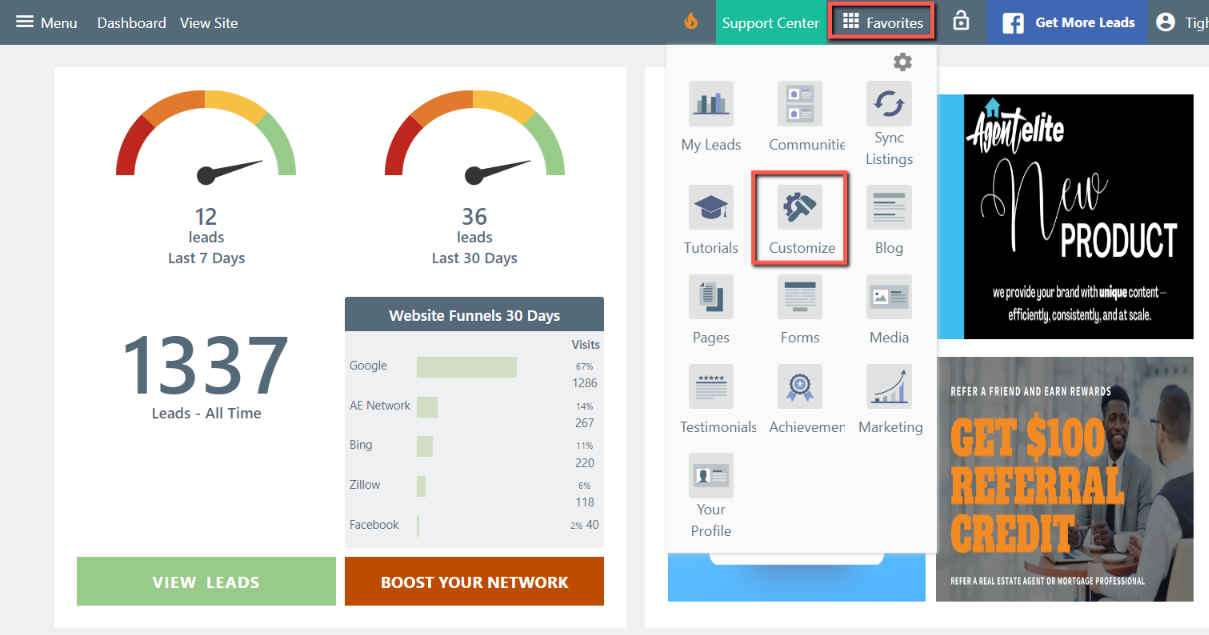
From the website dashboard, click on the Favorites waffle and select Customize.
Select Company Information on the left.

Change email in the Company Email box.

Click Publish to complete.
You can also access this spot by going to Customizer → Lead Management → Edit Company Info
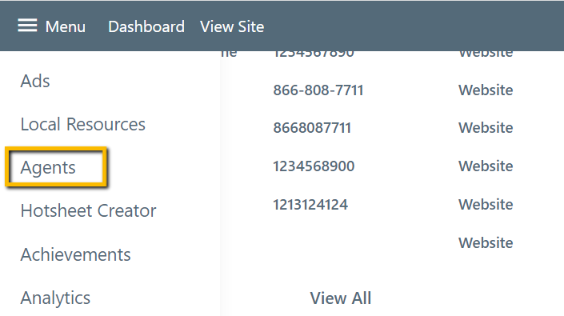
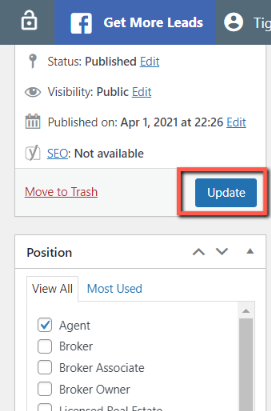
Website Dashboard → Menu → Agents
From the website dashboard, click Menu in the upper left corner and select Agents (View All) from the dropdown.
Click on the agent name.
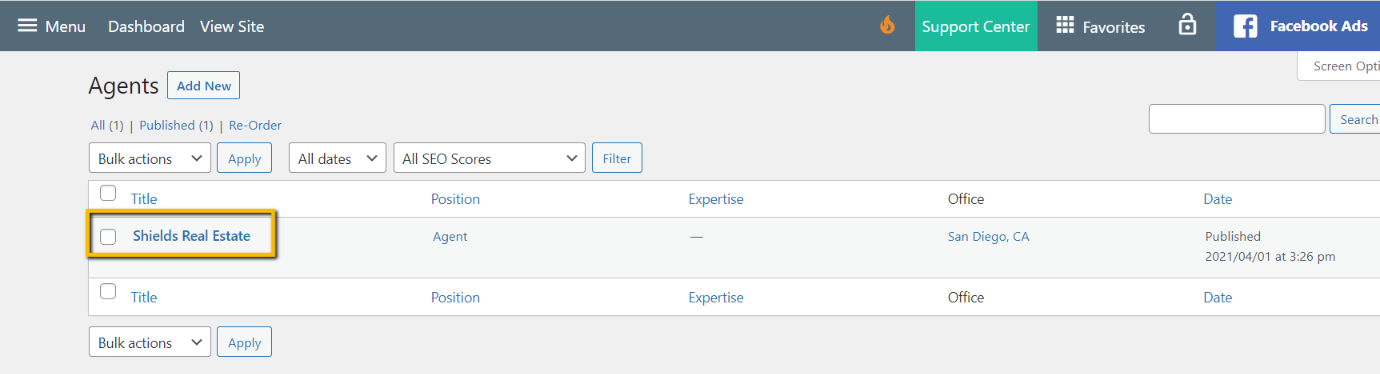
Change the email in the Agent Information column on the right.

Click on Update when finished (scroll down on the bottom right).
Website Dashboard → Menu → Users
From the website dashboard, click Menu in the upper left corner and select Users from the dropdown.
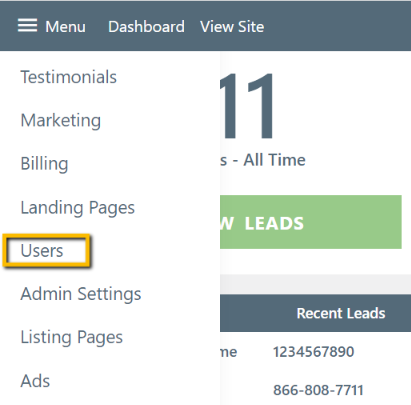
Click on the Username.

Update the email under Contact Info.

Save to complete (click on Update User at the bottom).
CRM → Setup → Account → My Account → Contact Person Details
From the website dashboard, click on the green bar that says View Leads.

In the CRM, select Setup at the top, then select My Account under Account on the left.
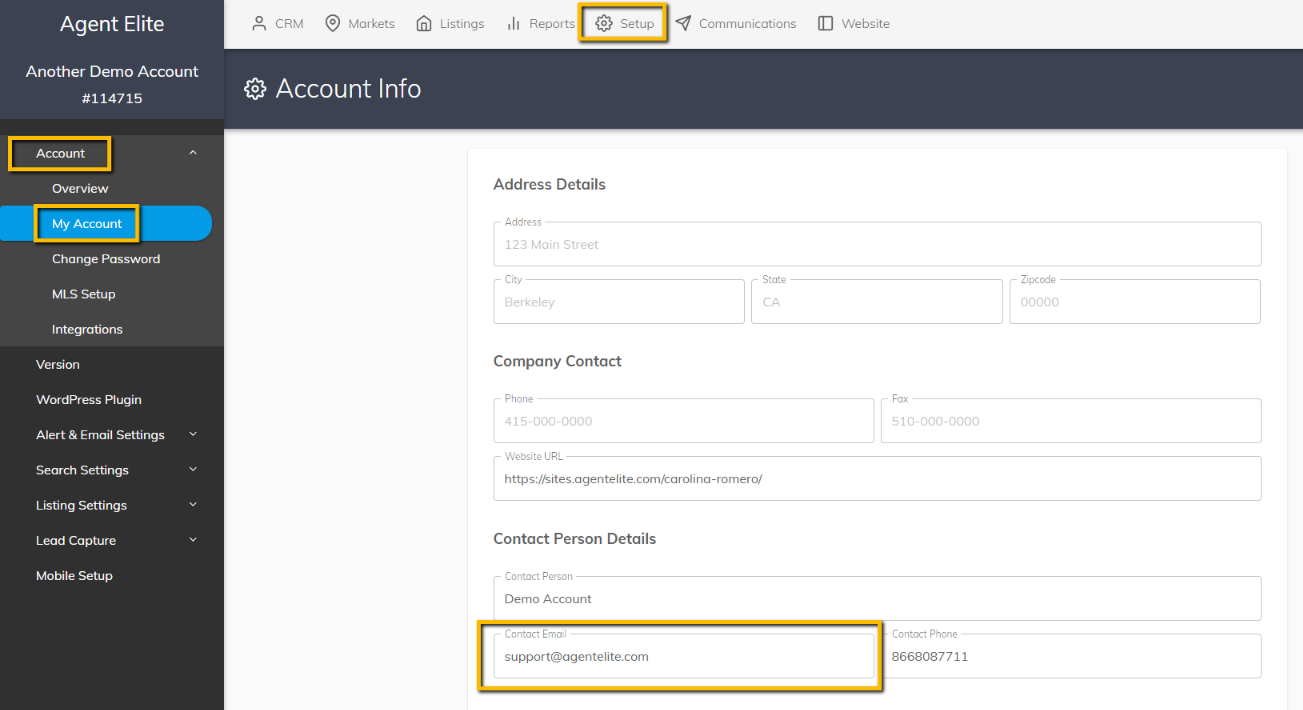
Save Changes to complete.
CRM → Setup → Alert & Email Settings → Basic Setup
From the website dashboard, click on the green bar that says View Leads.

In the CRM, select Setup at the top, then select Basic Setup under Alert & Email Settings on the left.
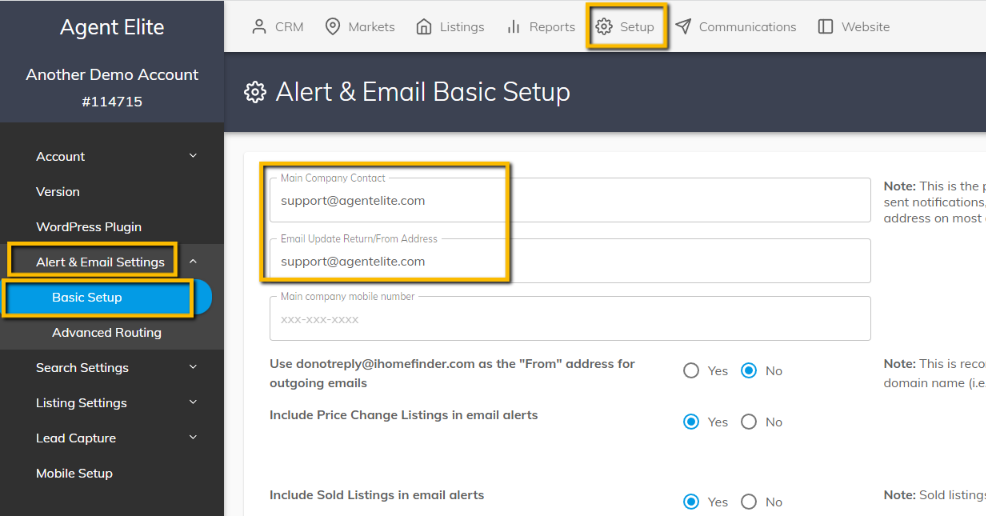
Save Changes to complete.
*Please also check the Advanced Routing tab below Basic Setup.